
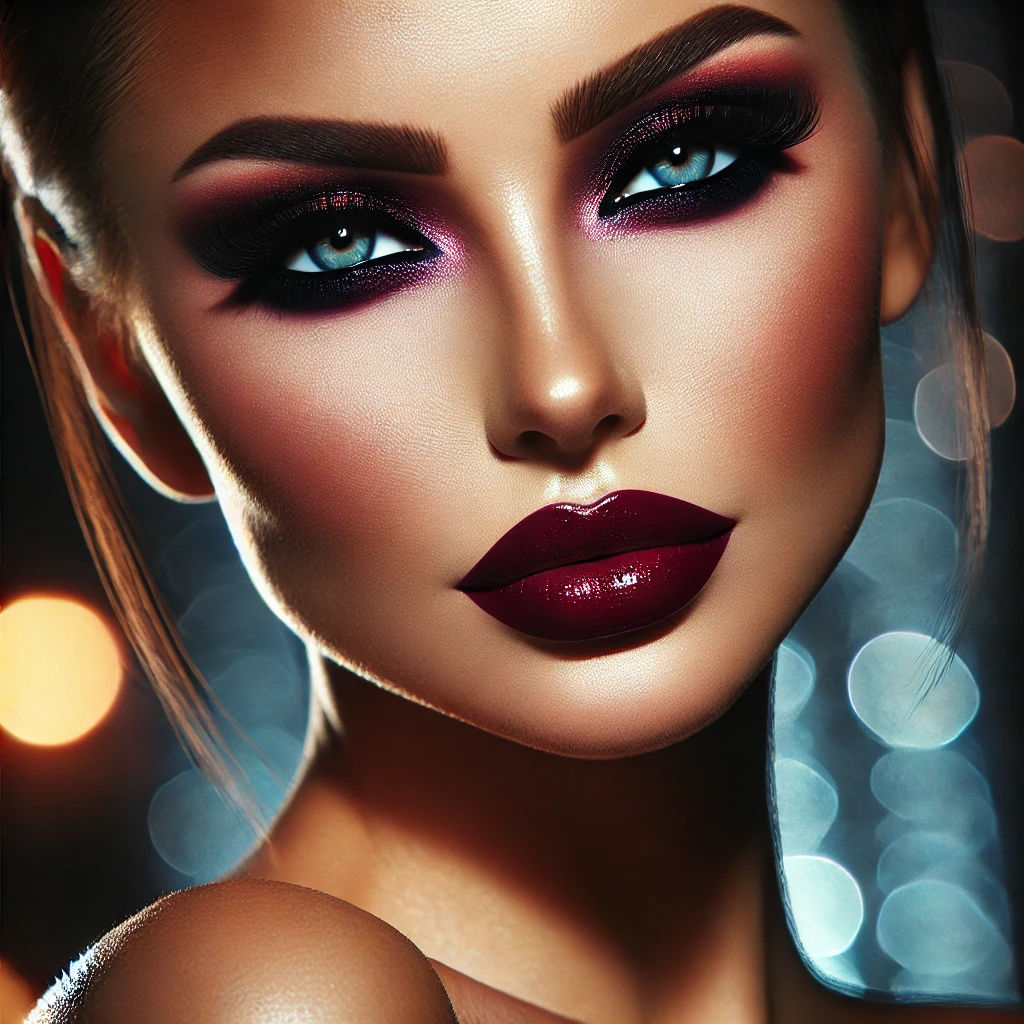
Creating a smoky eye look can seem intimidating, but with the right techniques and tools, you can achieve this timeless and sophisticated look. Whether you’re preparing for a night out or a special event, a smoky eye adds a touch of glamour and drama to your appearance. In this guide, we’ll walk you through the process, from selecting the right products to mastering the blending techniques. Plus, we’ll answer some frequently asked questions to ensure you have all the information you need to perfect your smoky eye.
Before you start, make sure you have the following items:
- Eyeshadow Palette: A palette with shades of black, gray, brown, and a shimmery highlight.
- Eyeliner: Both pencil and liquid or gel options.
- Mascara: For voluminous lashes.
- Q-tips and Makeup Remover: For quick fixes.
Step 2: Prep Your Eyelids
This step is crucial as it helps the eyeshadow adhere better and prevents creasing. If you don’t have an eye primer, a concealer can work as a substitute.
Step 3: Apply a Base Color
Choose a neutral shade close to your skin tone and apply it all over your eyelid. This will create a smooth canvas for the darker shades you’ll apply later. Use a flat shader brush to pack on the color evenly.
Step 4: Define the Crease
Select a medium-toned brown or gray shade to define your crease. Use a fluffy blending brush and apply the color in a windshield-wiper motion. This helps to add depth to your eyes and serves as a transition color for the darker shades.
Step 5: Add the Dark Shade
Pick a dark eyeshadow (black, deep gray, or dark brown) and apply it to the outer corner of your eyelid. Gradually build up the color, blending it into the crease and slightly towards the center of the lid. The key to a perfect smoky eye is blending, so take your time to ensure there are no harsh lines.
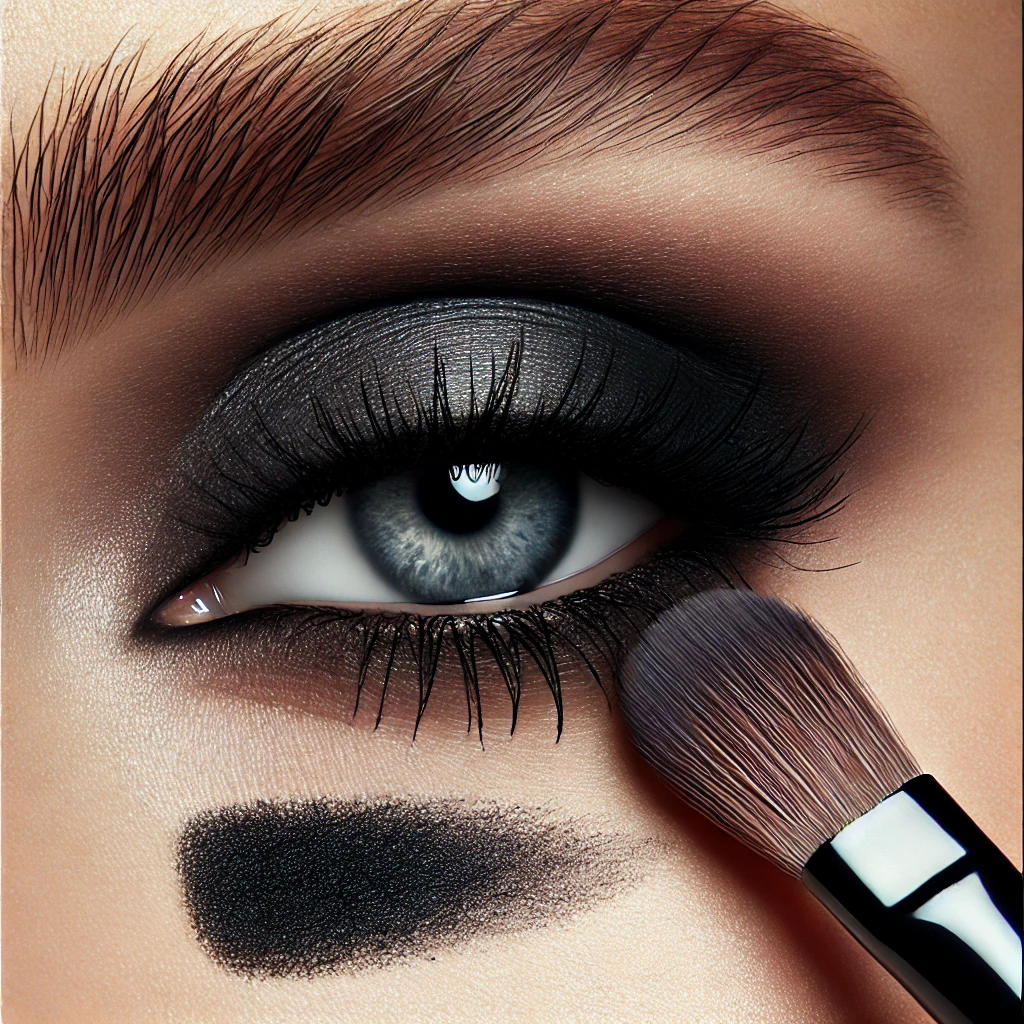
Step 6: Intensify the Look
For a more intense smoky eye, apply a black or dark eyeliner to your upper and lower lash lines. Smudge it out using a small smudging brush or Q-tip. This adds to the smoky effect and makes your eyes look more dramatic.
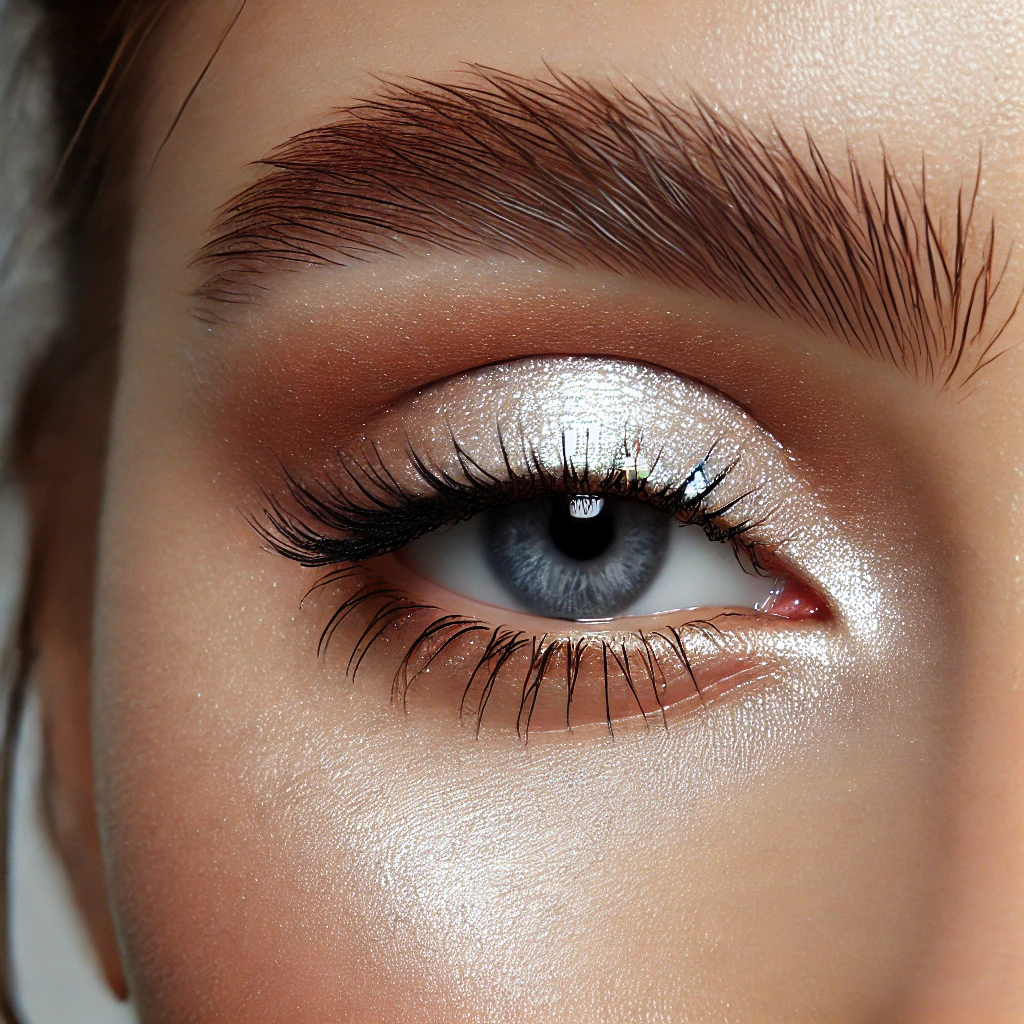
Step 7: Highlight the Inner Corner and Brow Bone
Use a shimmery or light-colored eyeshadow to highlight the inner corner of your eyes and the brow bone. This will make your eyes look brighter and more awake, balancing out the dark shades on your lids.
Step 8: Apply Mascara
Finish off the look by curling your lashes and applying a generous coat of mascara. For extra drama, consider using false lashes.
Step 9: Clean Up
Use a Q-tip dipped in makeup remover to clean up any fallout or sharpen the edges of your eyeshadow. This step ensures your smoky eye looks polished and professional.
FAQs
Q1: Can I use different colors for a smoky eye look?
A: Absolutely! While the classic smoky eye uses black, gray, and brown, you can experiment with different colors like plum, navy, or emerald green. The key is to blend well and create a gradient effect.
Q2: How do I prevent eyeshadow fallout?
A: To minimize fallout, tap off the excess eyeshadow from your brush before applying it to your eyelid. You can also hold a tissue under your eye while applying the eyeshadow or do your eye makeup before your face makeup.
Q3: What should I do if my smoky eye looks too dark?
A: If your smoky eye looks too intense, use a clean blending brush to soften the edges and diffuse the color. You can also apply a lighter shade over the dark areas to tone it down.
Q4: How can I make my smoky eye last all night?
A: Using an eye primer is essential for longevity. Additionally, setting your eyeshadow with a translucent powder can help prevent creasing and fading. Opt for waterproof eyeliner and mascara to keep your look intact.
Q5: Can I create a smoky eye with hooded eyes?
A: Yes, you can! Focus on applying the darker shades slightly above your natural crease to ensure they are visible when your eyes are open. Keep the lid space lighter to create the illusion of larger eyes.
Q6: Is a smoky eye appropriate for daytime?
A: While a smoky eye is often associated with evening wear, you can create a softer version for daytime by using lighter shades and keeping the intensity low. Opt for brown or taupe shades instead of black for a more subtle look.
Conclusion
Creating a smoky eye look doesn’t have to be daunting. With practice and the right techniques, you can achieve a stunning and sultry look that enhances your eyes. Remember, blending is the key to a flawless smoky eye, so take your time and enjoy the process. Experiment with different colors and styles to find what works best for you, and soon, you’ll be able to master this classic makeup look with confidence.
Стильные советы по созданию отличных луков на каждый день.
Мнения экспертов, новости, все коллекции и мероприятия.
https://omskdaily.ru/news/2024-09-20-10-samyh-vliyatelnyh-dizaynerov-2024-goda-trendsettery-kotorye-izmenyayut-modu/
Pingback: Korean Makeup Brands: Unlocking the Beauty Secrets of the East